

How to create a virtual network
Learn how to create a simulator network or localnet with project wallets using Studio or the CLI
Create an isolated network for scripts and application integration tests.
Prerequisites
- Acton 1.2 or later installed.
- An Acton project containing
Acton.toml. - For startup accounts, configure project wallets. The CLI examples use
deployer. - For localnet, a running Docker engine with Compose v2, as specified in the localnet requirements.
Create the network
Start Studio from the project root:
acton studio- Open Virtual environments → Create environment.
- Select Simulator or Localnet and enter a name.
- For a simulator, keep Clean network or choose a public-network fork.
- Select project wallets under Startup accounts, or clear the selection for no startup wallets.
- Select Create environment and wait for readiness. Open the resulting environment.
Studio preselects [localnet].accounts, but initializes only the wallets submitted in the form. Each selected wallet starts with 100 GRAM.
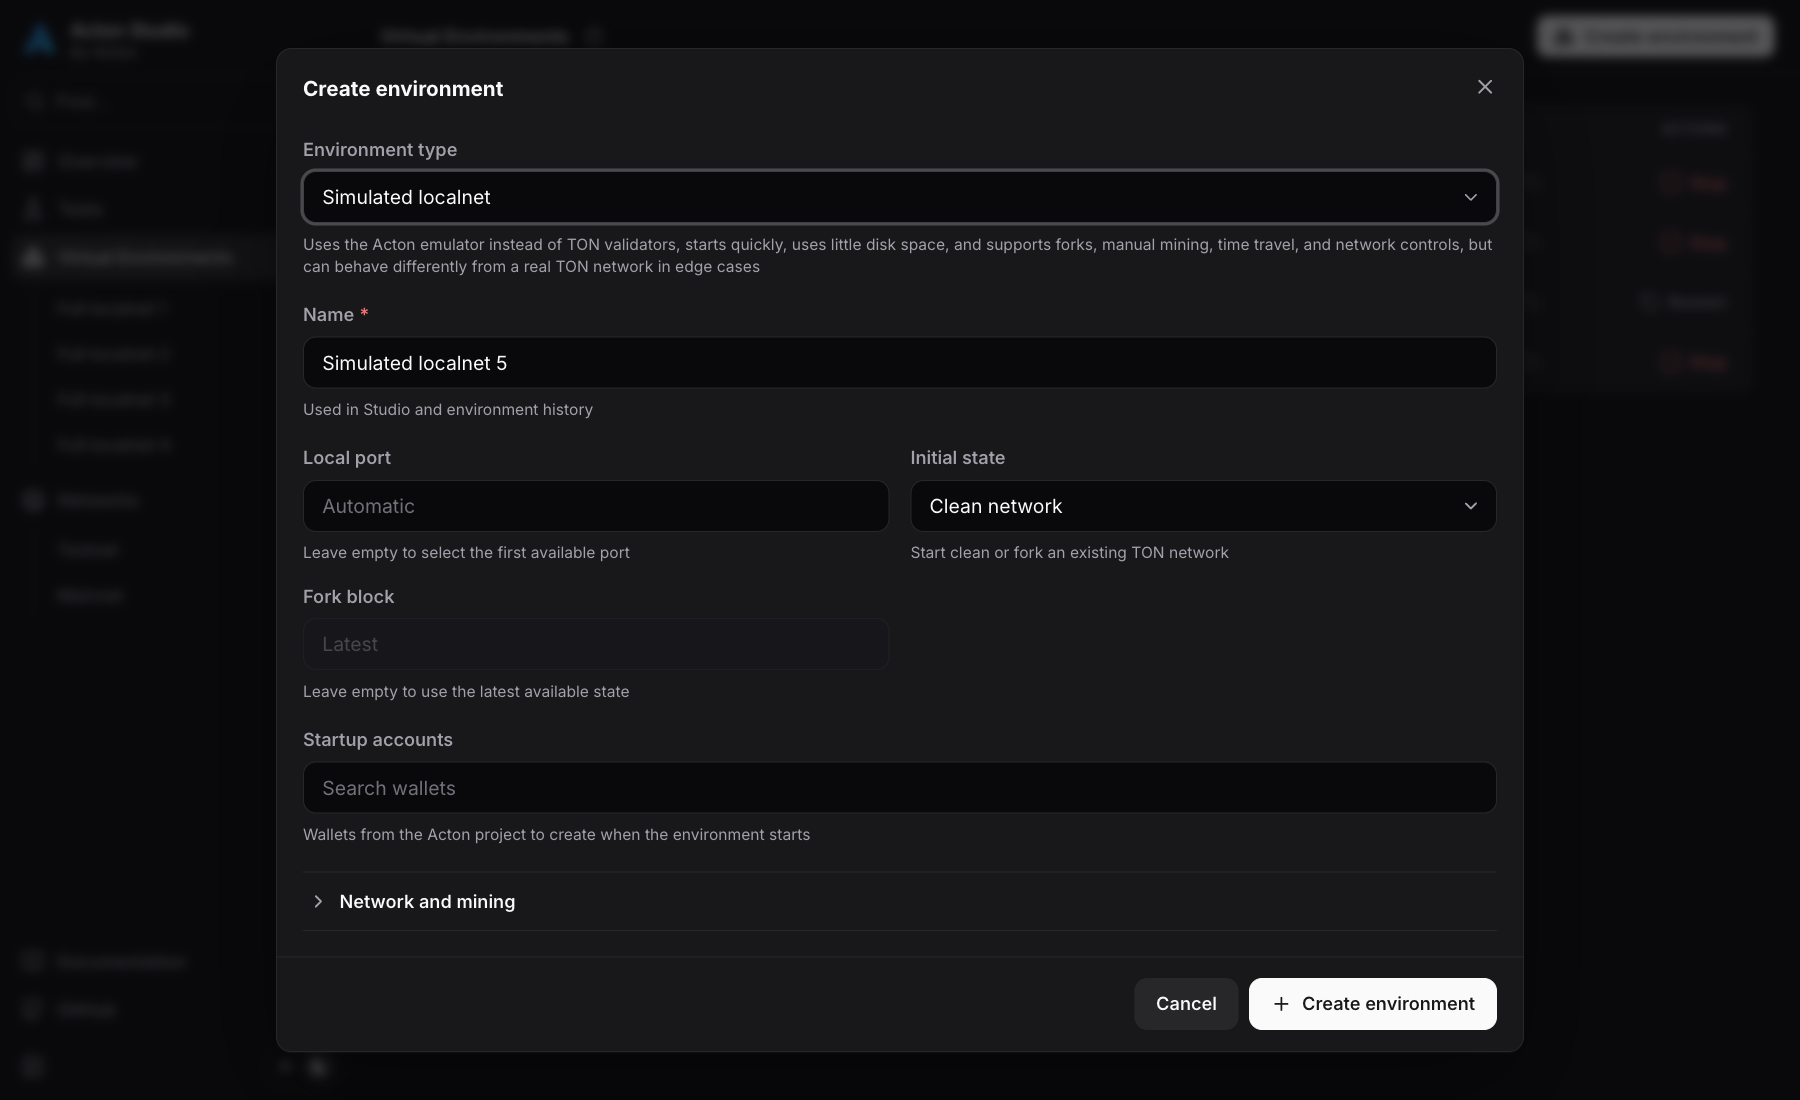
Start a persistent network on port 5411:
acton simulator start --port 5411 --db-path .acton/simulator.sqlite --accounts deployerThe deployer must be a configured wallet. Omit --accounts to use [localnet].accounts, or pass --accounts "" to select none. Keep this terminal open.
In another terminal, inspect readiness:
acton simulator status --port 5411 --jsonConfigure defaults in Acton.toml; explicit flags override them.
Create a named network and leave it running in the background:
acton localnet start dev --port-base 19000 --accounts deployer --detach
acton localnet status dev --json
The command waits for readiness and prints endpoint URLs.
Without --detach, a newly launched service stays in the foreground and Ctrl+C would stop it.
The deployer must be a configured wallet. Omit --accounts to use [localnet].accounts, or pass --accounts "" for no project wallets.
The port range 19000–19004 must be free. Omit --port-base to let Acton choose a range.
These options apply to new networks. Resume an existing network without creation options.
Verify and continue
- In the Studio, confirm the environment is running and open Home.
- From the CLI, confirm
running: truefor the simulator orstatus: "running"for localnet.
Next, connect scripts and applications using the reported URLs.
Last updated on