

How to connect scripts and applications
Learn how to connect Acton deployments, TypeScript clients, and other TON tools to the selected virtual environment
Configure deployment scripts, remote procedure call (RPC) clients, and wallet signing for the selected environment.
Deployment submits transactions to the configured endpoint. Verify that the URLs belong to the selected simulator network or localnet before running a script.
Save a snapshot to restore local state after deployment.
Prerequisites
- A running virtual environment.
- An Acton deployment script or an application with a TON RPC client.
- For deployment, a funded wallet in that environment.
Connect a client
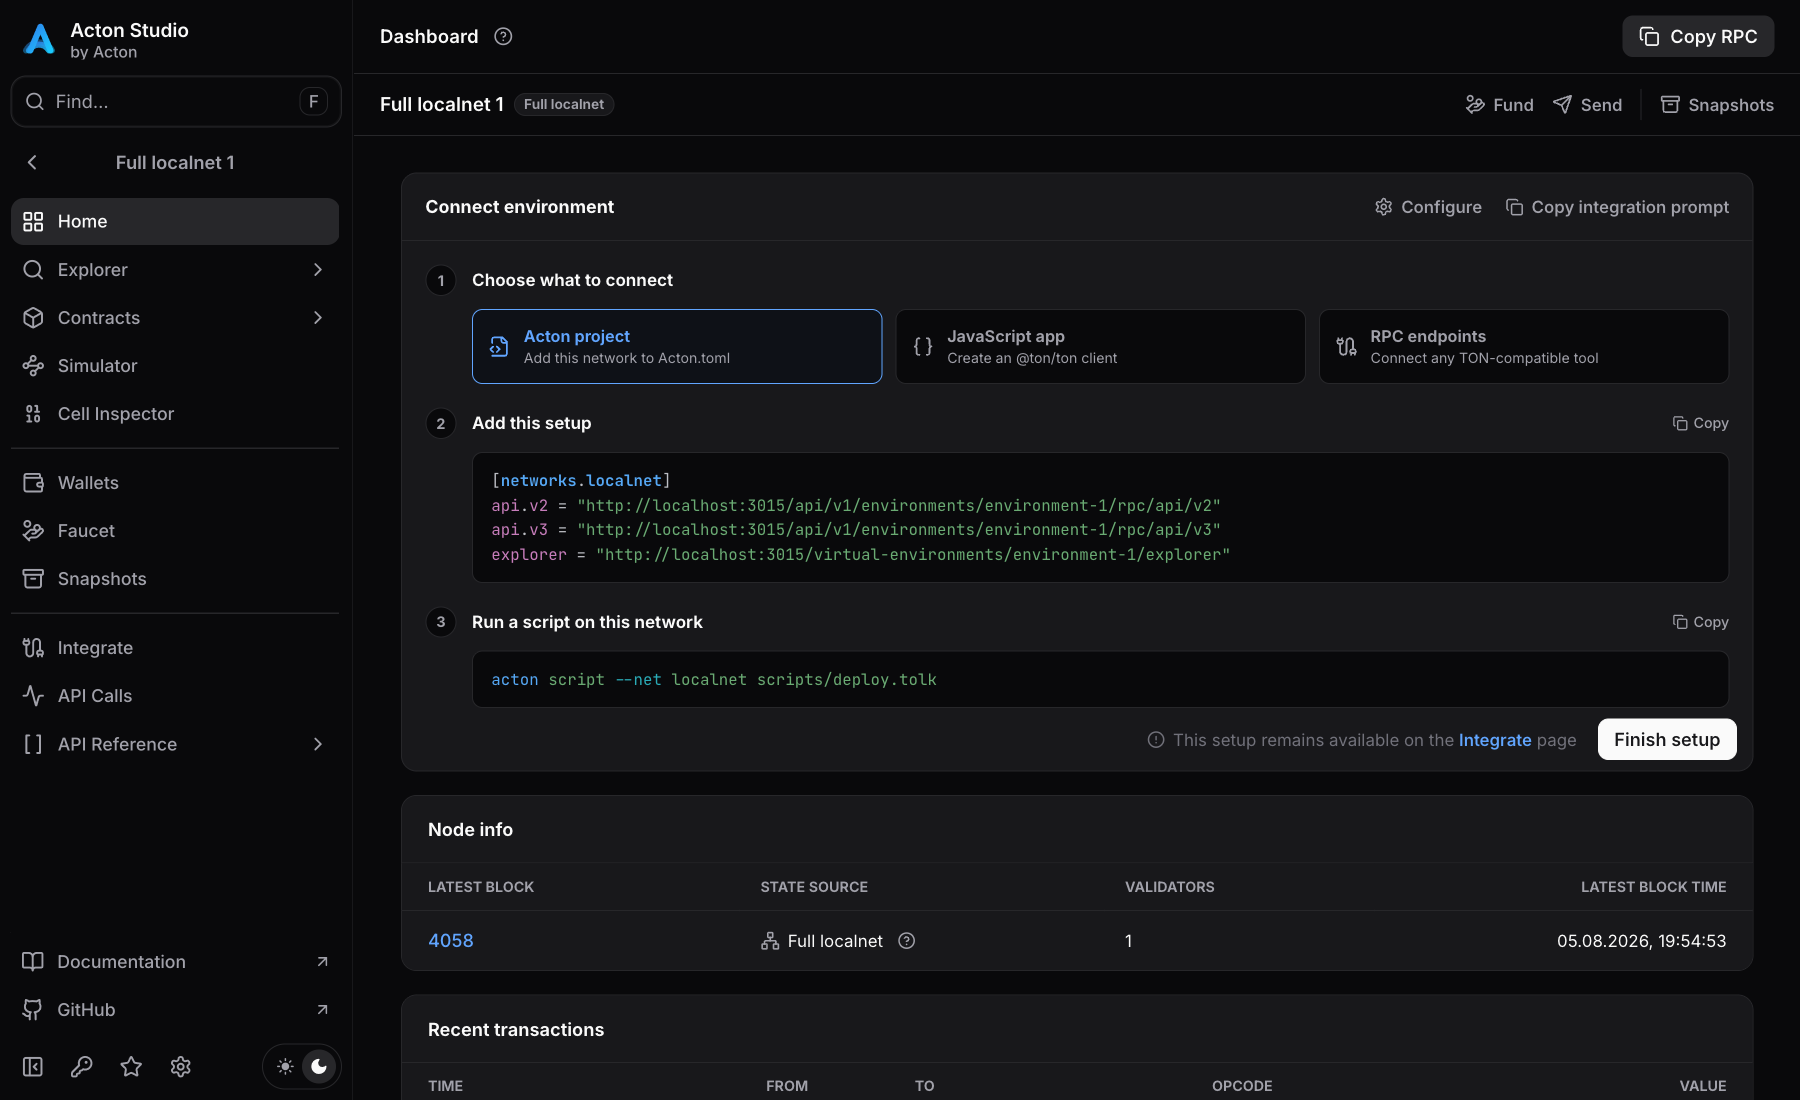
- Open the environment, then Home → Connect environment.
- Select Acton project and copy the generated network entry into
Acton.toml. - Run the accompanying deployment command with a funded startup wallet.
- For an application frontend, select JavaScript app and apply the generated
@ton/tonclient settings for JavaScript or TypeScript. RPC endpoints lists TON Center URLs for other tools.
The Integrate page retains these examples. Generated Studio proxy URLs remain stable across runtime restarts and environment renames. Use the command's generated network name; selecting another browser workspace does not change the CLI destination.
For decentralized application (dApp) signing, open Wallets and use its TON Connect controls. The wallet connection and RPC client must target the same environment. TON Connect configures signing; Integrate configures reads and message submission.
For the simulator started on port 5411, add this entry to Acton.toml:
[networks.localnet]
api.v2 = "http://127.0.0.1:5411/api/v2"
api.v3 = "http://127.0.0.1:5411/api/v3"
Run a deployment script from the project root:
acton script scripts/deploy.tolk --net localnetlocalnet is the Acton network selector here; it can target a simulator. For Studio observation, use its generated proxy URLs as described under UI.
Read the actual endpoints first:
acton localnet status devFor a network created with --port-base 19000, use:
[networks.localnet]
api.v2 = "http://127.0.0.1:19002/api/v2"
api.v3 = "http://127.0.0.1:19003/api/v3"
acton script scripts/deploy.tolk --net localnetFor multiple connections, use a named entry such as [networks.dev] and select --net custom:dev. Use the URLs printed for that network rather than assuming the example ports.
Verify the destination
Open the deployed address in the selected environment's Explorer. When using Studio proxy URLs, inspect API calls and Contracts.
A build provides source and application binary interface (ABI) artifacts — source matching requires the deployed code hash to match.
Localnet control API
Some administrative tasks have an HTTP API without a dedicated CLI subcommand. For a standalone localnet, find its ID with:
acton localnet status dev --jsonUnder .acton-localnet/networks/, locate the directory whose network.json has that id. Its private service.json contains url and token while the service runs.
Directory names include a sanitized name and an ID hash — they are not the network ID itself.
A custom --state-dir would change the catalog root.
The control token permits state changes on the selected localnet. Keep it out of shared logs and version control. These credentials do not authorize testnet or mainnet operations.
In the HTTP examples, replace <CONTROL_URL> with the descriptor's loopback url and <CONTROL_TOKEN> with its token. These credentials belong to the Acton control service, not the container's Config or Admin endpoint. Verify the service:
curl --fail '<CONTROL_URL>/v1/health' \
  -H 'Authorization: Bearer <CONTROL_TOKEN>'
The response identifies acton-localnet and protocol version 1. Re-read the descriptor after a service restart. Prefer the Studio UI for interactive configuration and administrative work.
Last updated on